Step 4: Create a product
Your products are the goods, digital downloads, services, and gift cards that you sell. You add a product in ClickCRM by entering product details and uploading product images.
When you are adding or updating a product, you can make the product available to one or more of your sales channels.
You view, add, update, and organize all of your products and variants from the Products page in the ClickCRM admin.
Setting up a product
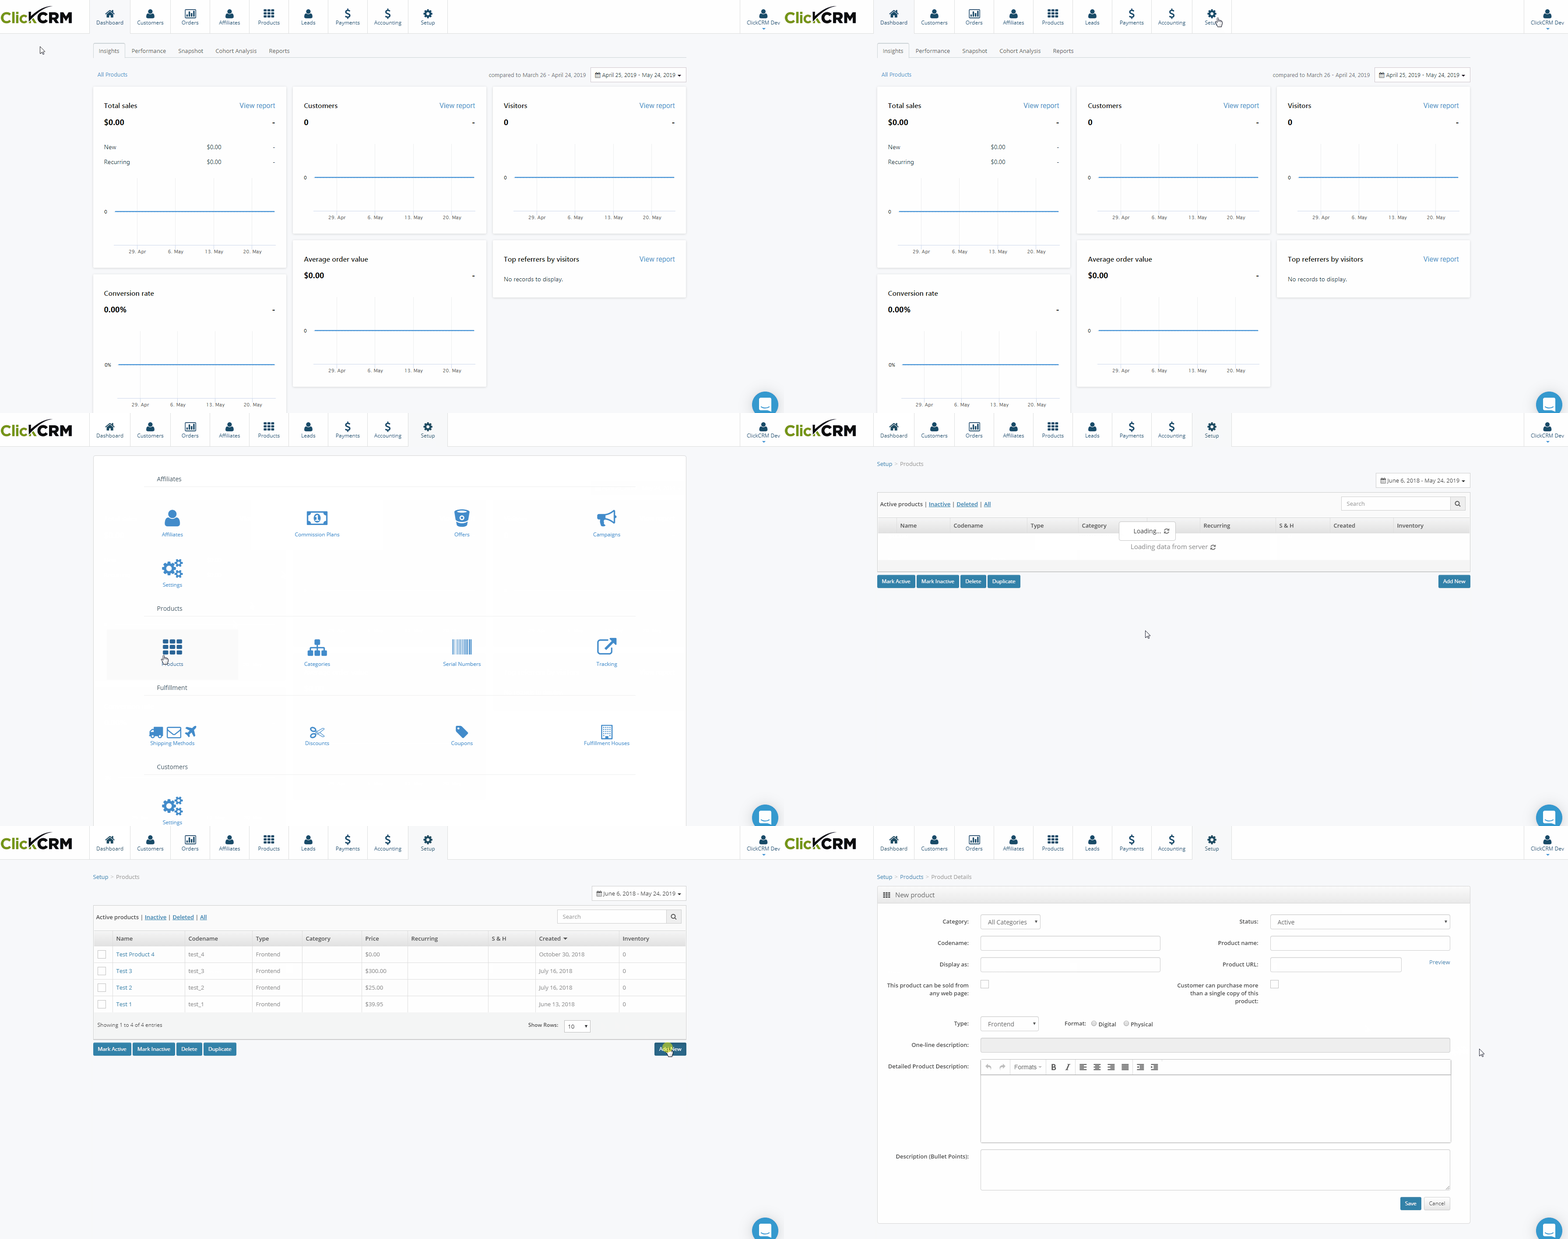
- From your ClickCRM admin, go to Setup > Products and click on Add New.
- In the form, enter:
- the Product Codename
- the Product Name
- the Product Name(Display as) - How the customer sees it
- the Product URL (where customers go after they purchase the product)
- After selecting your Product Type, choose your Product Format.
- If you select a digital product, you can add a brief description of the product and then click Save.
- If you select a physical product, you must first select the Fulfillment House and add the Vendor SKU and quantity.
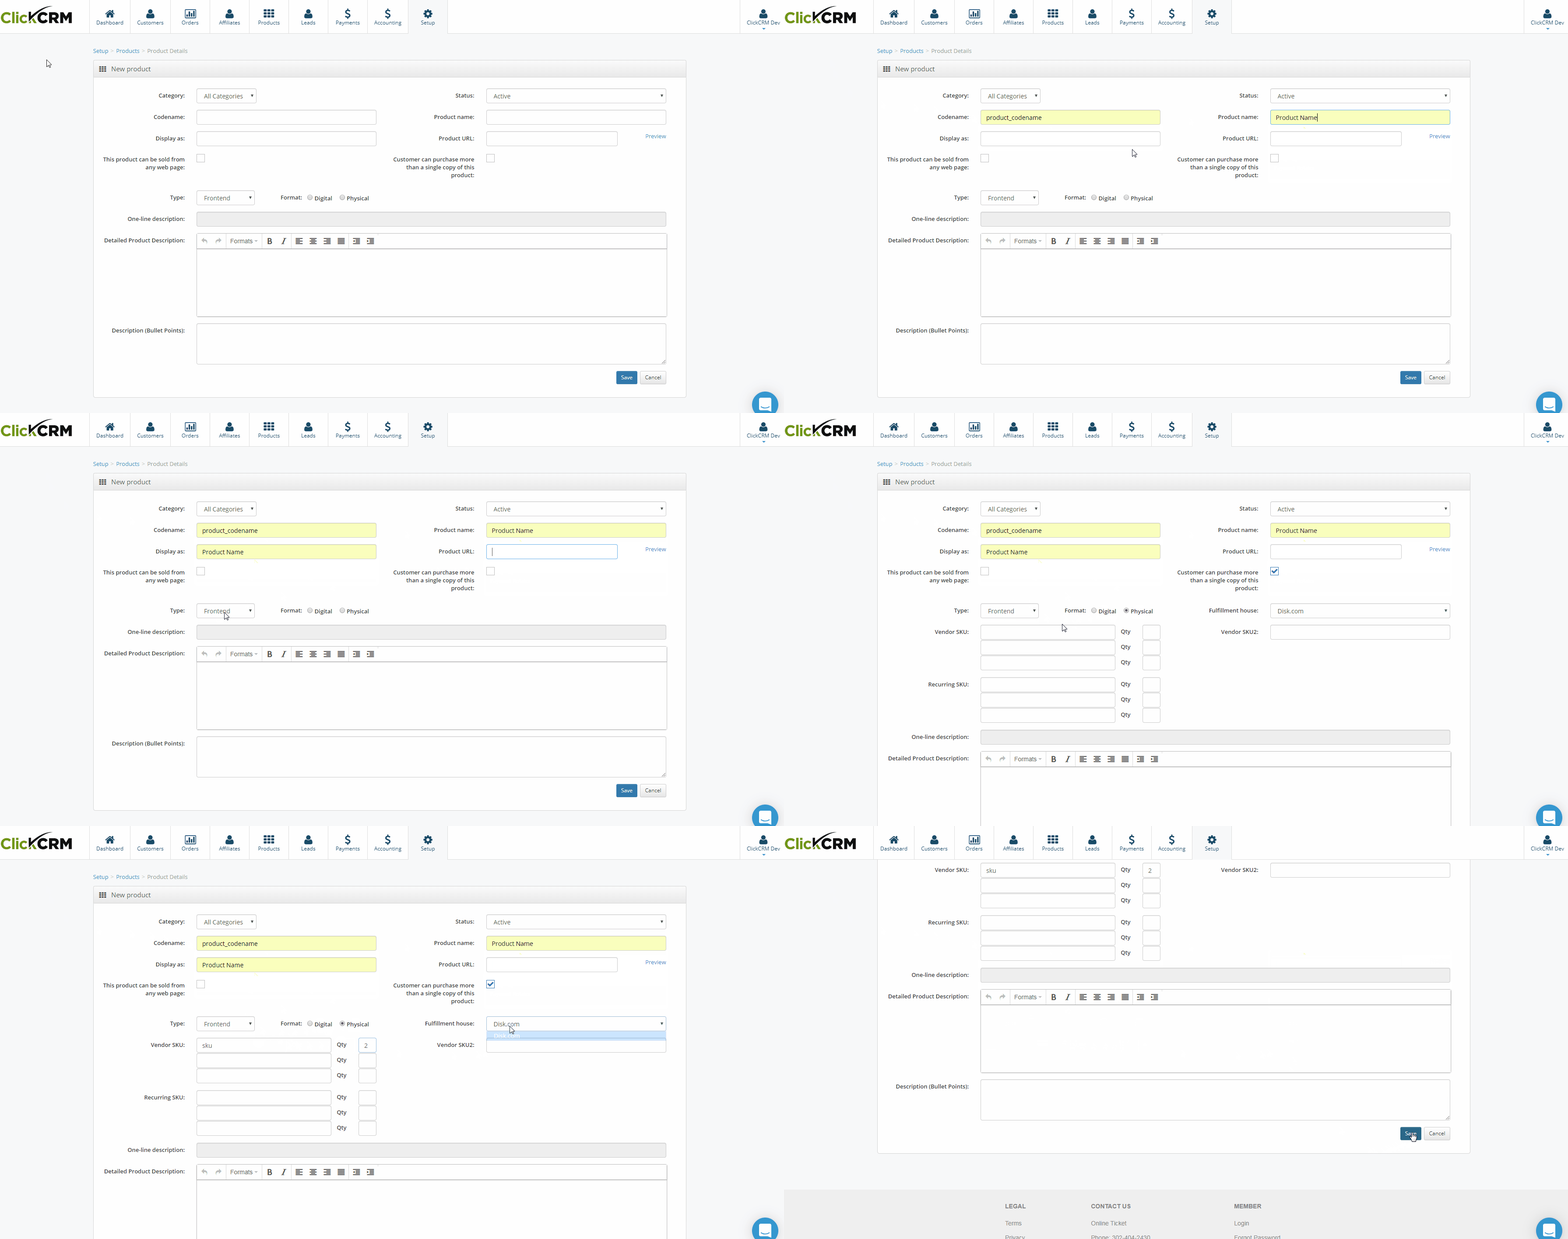
- Click Save. You will be redirected to the product details page.
Select your pricing scheme
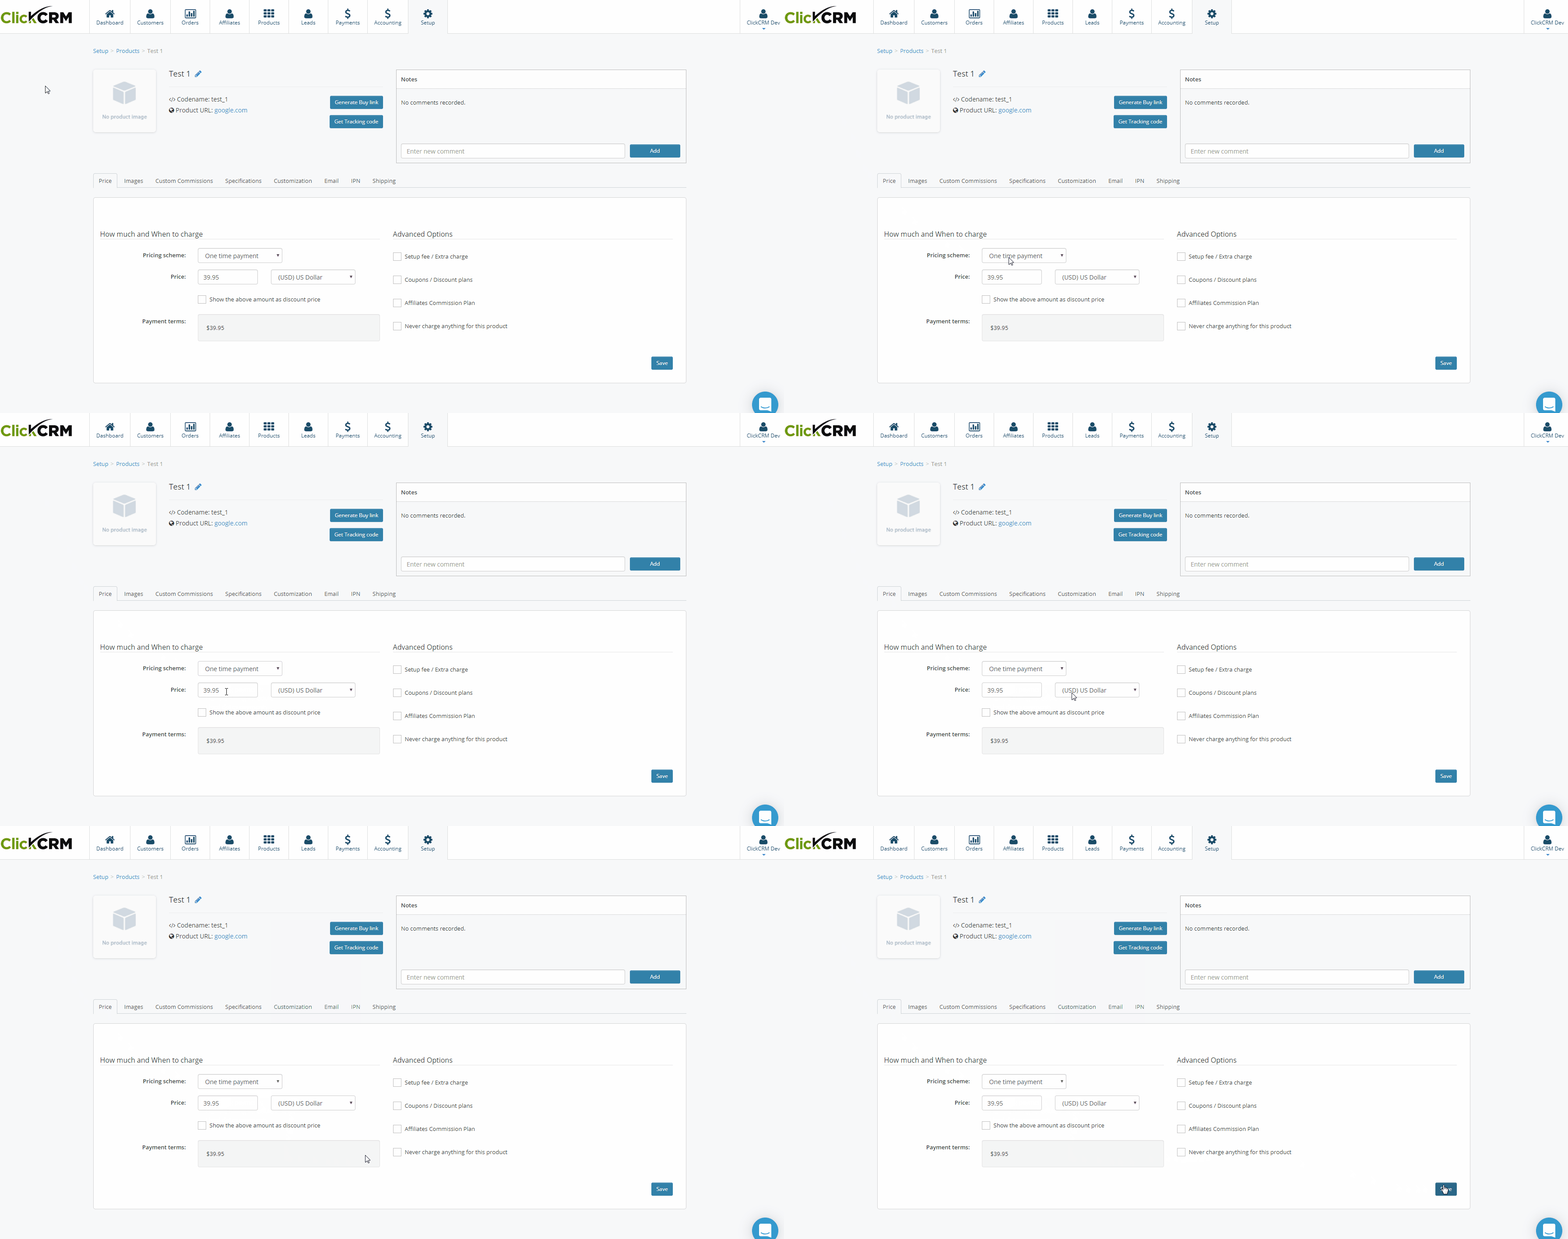
On the Price tab, you can choose how much and when to charge.
- For a straight sale product, from the pricing scheme select the ‘One time payment’ option. Enter your price, choose your currency and other advanced options, then click Save.
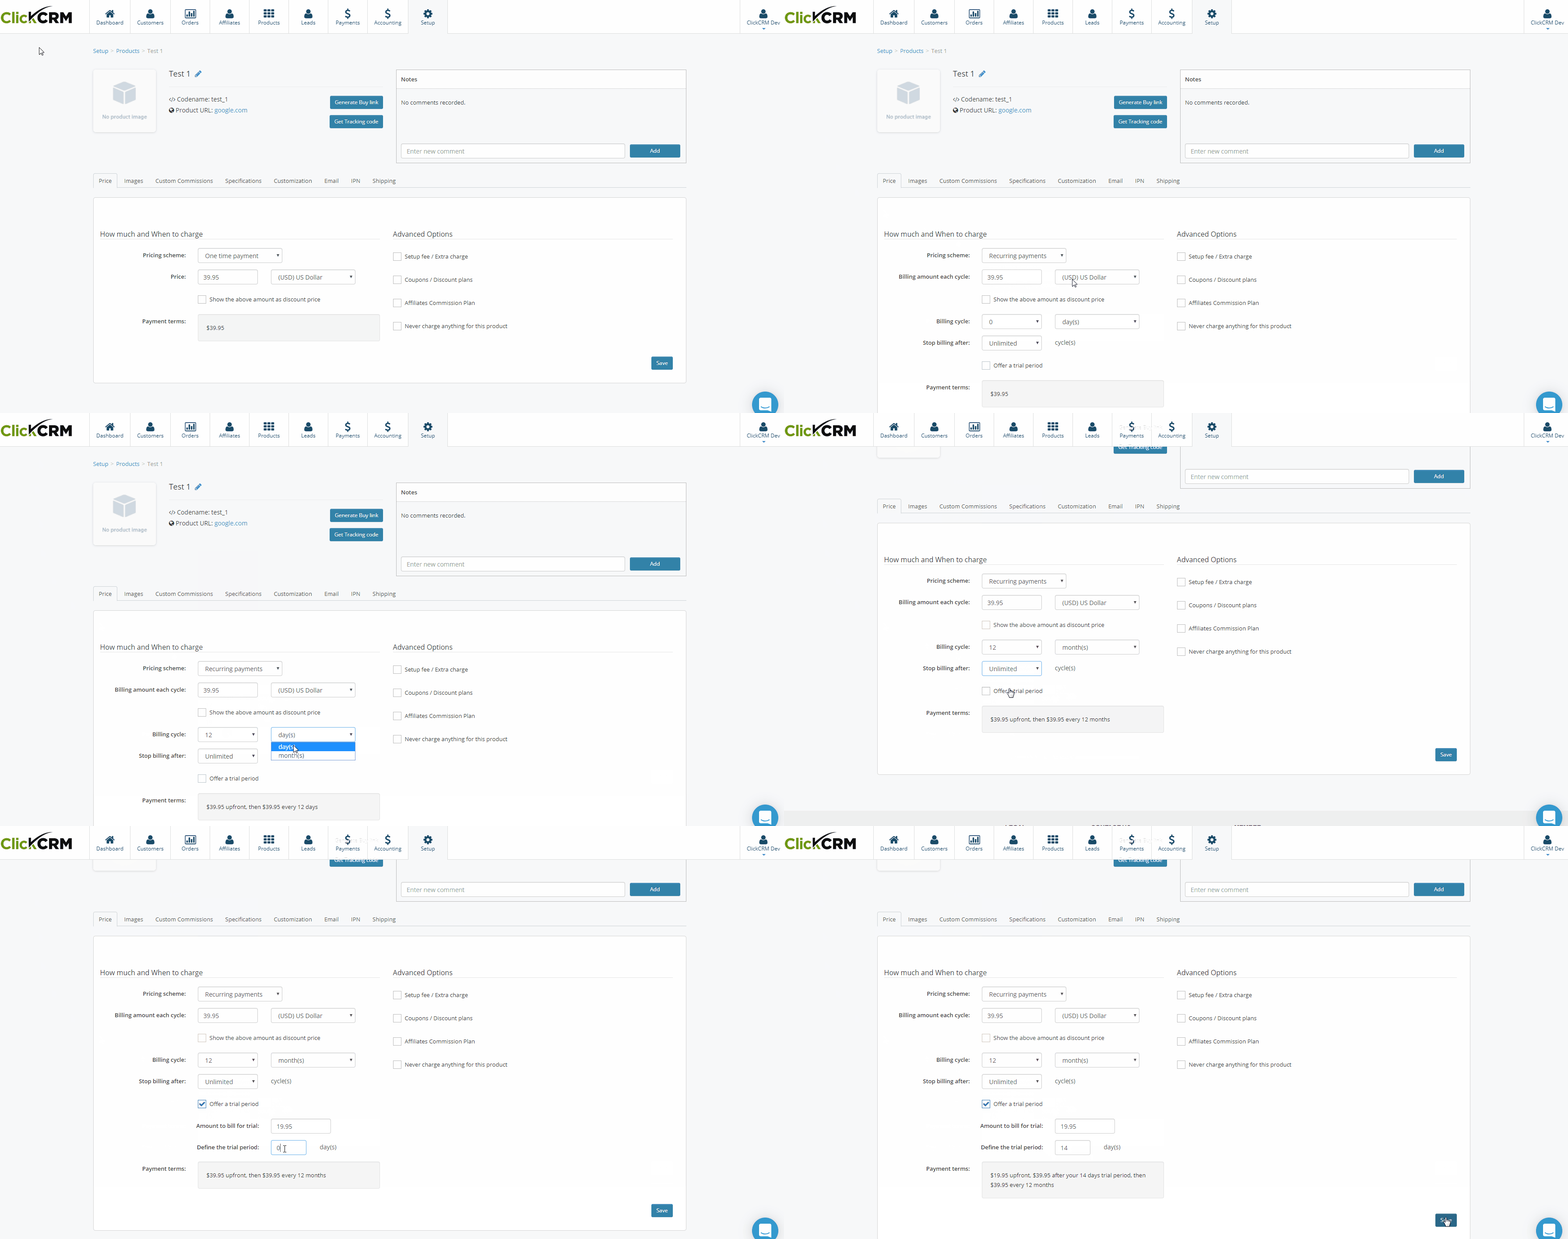
- For a trial/recurring product, from the pricing scheme select the ‘Recurring payments’ option. Enter your product price for each cycle below and then add how many cycles you want to bill and when to stop. You can also setup a trial period for each product and add more advanced options. Click Save.
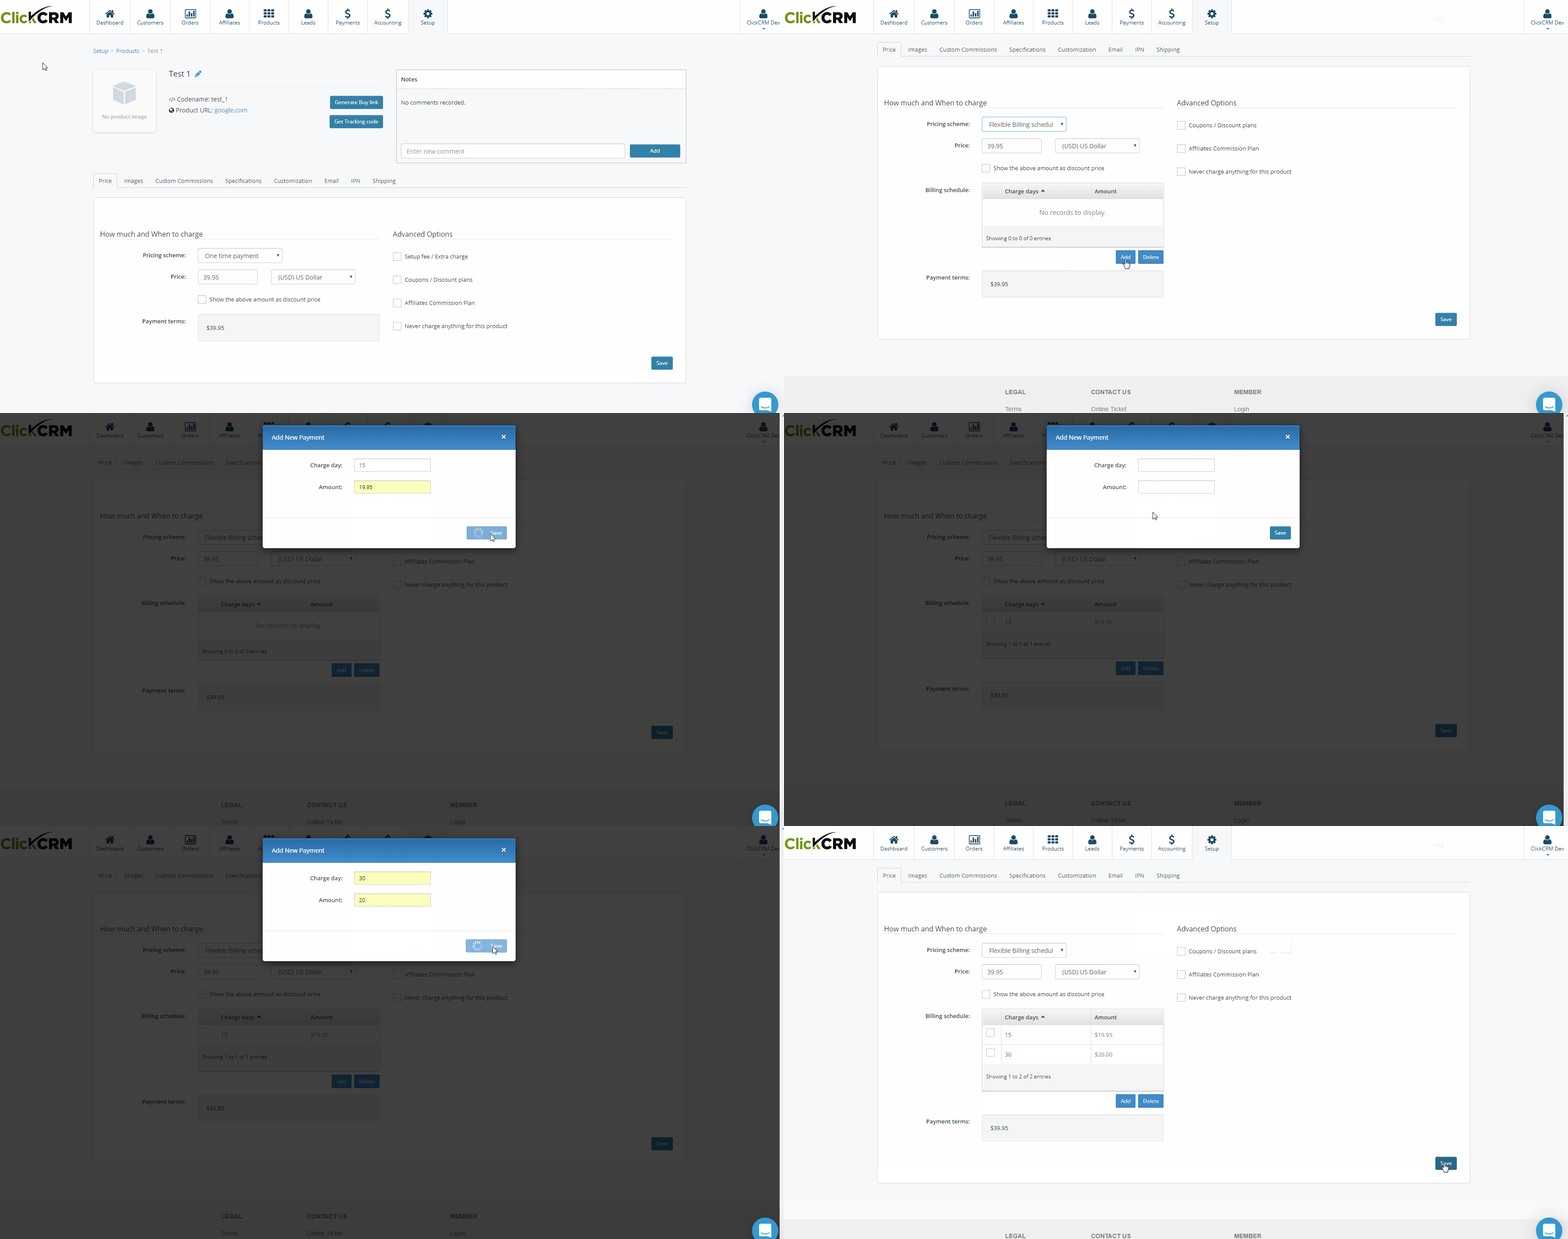
- To setup a flexible billing schedule for a product, from the Pricing Scheme select the ‘Flexible Billing schedule’ option. Enter your price below and choose your currency. To add a flexible charge click on the Add button from Billing schedule section. After selecting on what days to charge and the amount, click on Save. The charges are now listed in the table. When you're done, click Save.
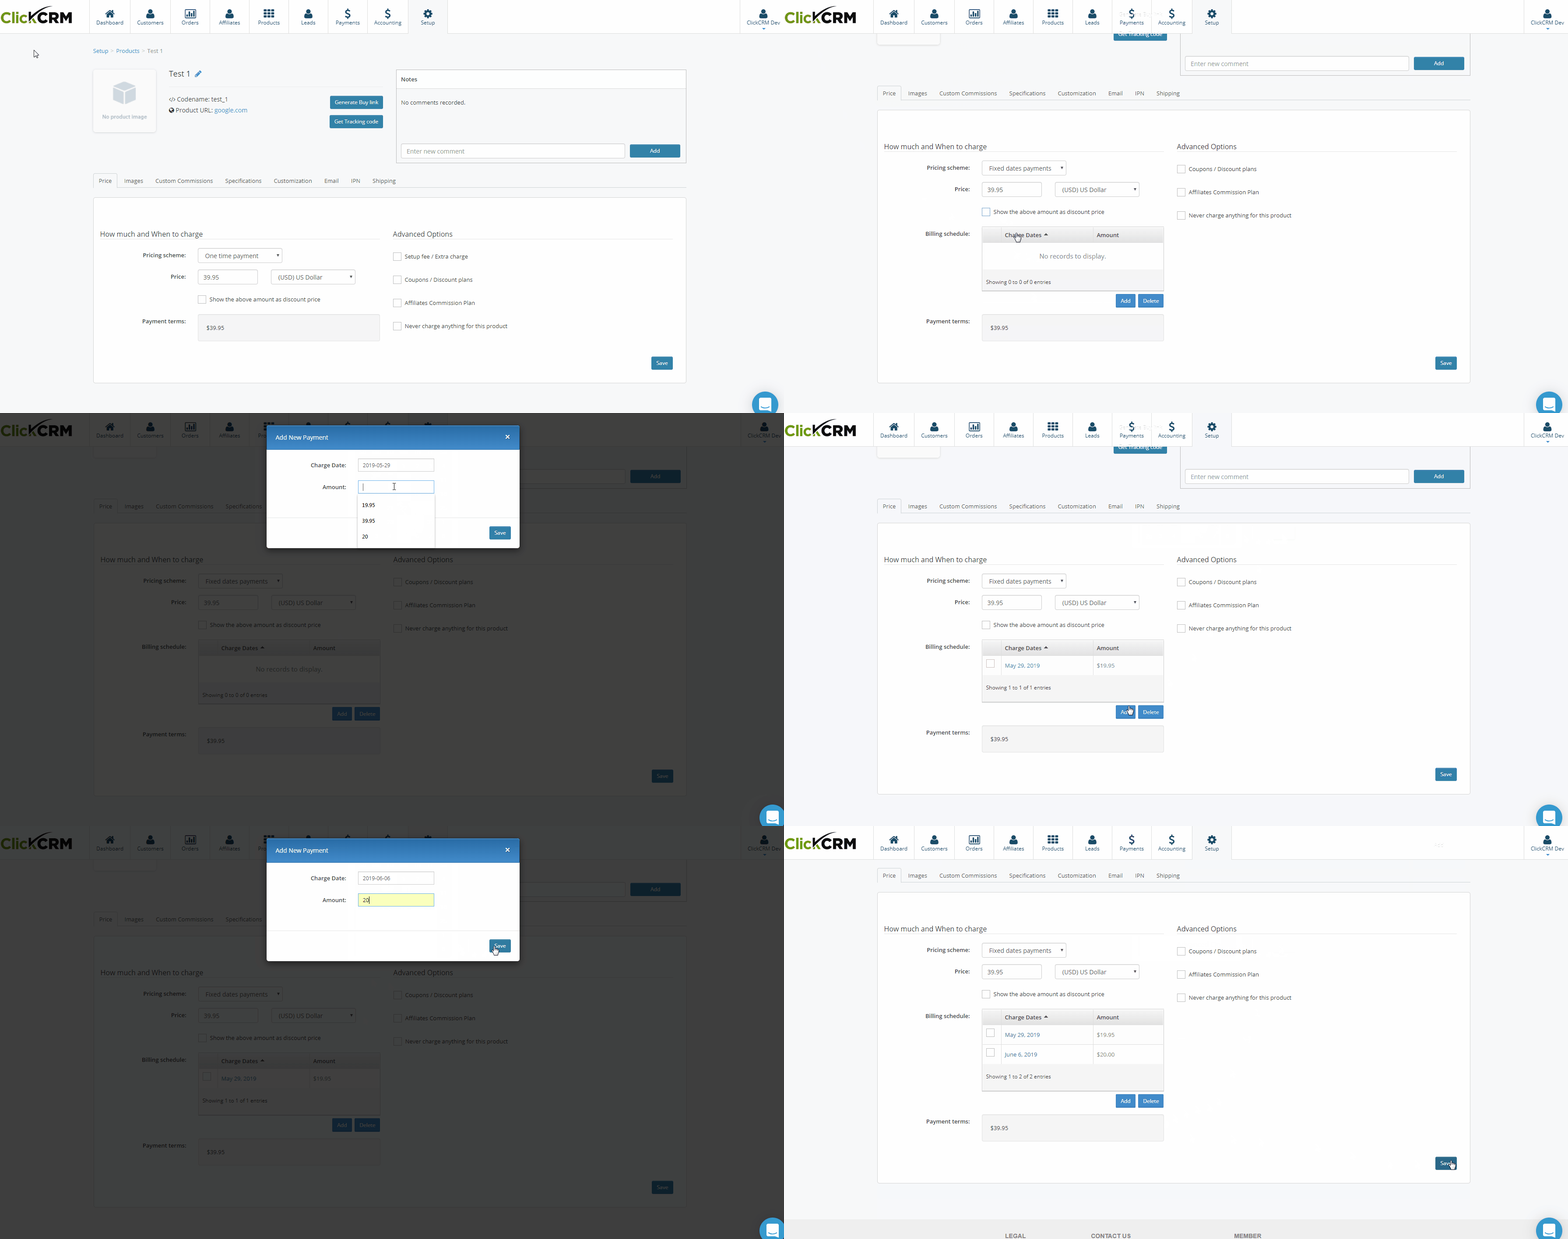
- To setup fixed dates payments for a product, from the pricing scheme select the ‘Fixed dates payments’ option. Enter your price below and choose your currency. To add a fixed date charge click on the Add button from Billing schedule section. After selecting on what dates to charge and the amount, click on Save. The charges are now listed in the table. Click Save.
Add a product image
Product images are displayed on your online store to let your customers see what your products look like. The images are also used on checkout and other sales channels. The best file type for most product images is JPEG and they must have a minimum size of 800 x 600 px.
The first image for each product is known as the featured, or main, image. The featured image is shown on the checkout page, home page, thank you page and others.
Steps:
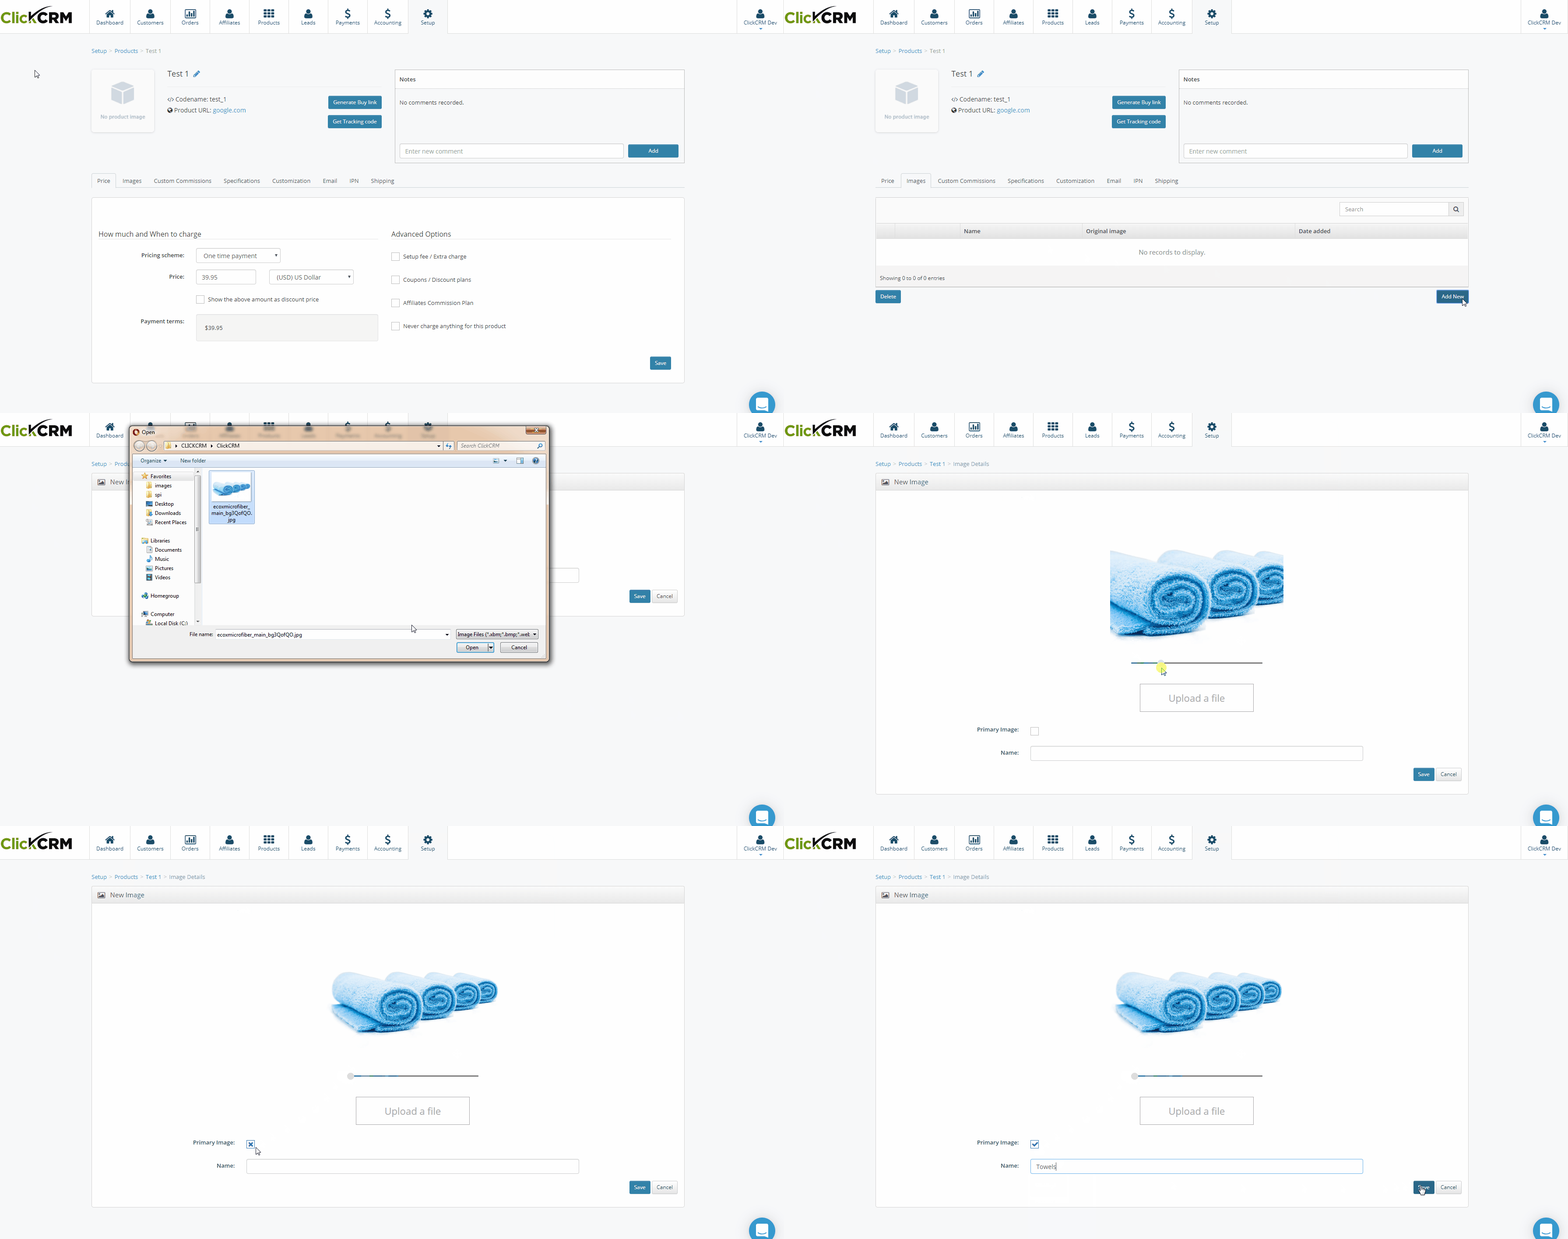
- From the Products page, click a product to see its details page, then click on the Images tab.
- In the Images section, click on Add New. Add your image with the Upload a file button.
- You can resize your image as you see fit using the horizontal scroll bar.
- If this is your Primary Image, mark the checkbox below the image.
- The Name field describes an image and is an important part of a product description. If an image can't load for any reason, the text is shown instead. It's also used by assistive technology to describe an image to a customer who's visually impaired. Including alternative text can boost your website's SEO. Keep it brief and descriptive.
- If you add more than one image to a product, be sure to leave the Primary Image checkbox unchecked, unless you're replacing the current main image.
Note: To make your images appear to be the same size, you need to use a consistent aspect ratio, or height-to-width ratio, for all the images that you add as your featured, or main images.
